
Is your computer slowing you down? Here’s a user-friendly guide that anyone can use to get his or her hardware and software back into tip-top shape speedily and for free.
If you still find yourself checking your watch while your computer starts up, even after installing your system updates, fret not. Whether your computer is still under it’s one-year warranty or is several years old, our handy instructions, tips, and tricks will help keep speed up your computer so that you won’t have to buy a whole new machine. Read our guide and learn how to make your computer spry again.
Cleaning your vents
Get your mind out of the gutter. We’re talking about your computer. Dust and lint can easily get into your computer’s vents, often leading to overheating of the central processing unit, which can cause poor performance, crashes, and random reboots. The solution is simple: clean it. You can use a compressed air canister (available at office supply stores or computer dealers) to flush dirt out of your vents. Your other option is to get bold and take apart your computer yourself.
If you choose to be daring, you’ll probably have an easier time with a PC than a Mac, which are notoriously hard to tinker with. You’ll most likely not be able to take your Mac apart and will have to visit an authorized repair center to do so. Another warning: opening your computer case could void your warranty, so check your manufacturer’s policy before proceeding. Still want to go ahead with it? Here’s what you’ll need to do.
1. Shut off your computer and unplug everything.
2. Grab a standard or Phillips screwdriver; this should be enough for you to open your computer.
3. Take it apart outdoors, if possible, as there could be scary amounts of dirt that may pour out. Wear shoes and stay away from carpets. If you have a desktop, flip your case so you’re facing the back panel. To release the side panel or the entire enclosure, check for either small knobs that you can turn by hand, or for buttons you can press. If you see neither of these, you may need to remove at least two screws.
If you have a laptop, find a clean, stable surface, cover it with a towel to prevent scratches, and place your computer upside down. Take out the battery. Next, use your screwdriver to remove the screws holding down the panel where the vents are located. Remember where each screw came from so you can replace it when you’re done.
4. While touching your computer’s innards as little as possible, use a compressed air canister to blow air all over (including into the power supply box and the fan, and any CD/DVD drives and ports), while using short bursts of air and maintaining the canister upright and at least a couple of inches away from your target. (Note: While blowing air on your fan, consider placing a toothpick or cotton swab between blades to keep it from overspinning.) If there’s any dirt left at this point, use tweezers or cotton swabs to delicately get it out. Whatever you do, do not use a vacuum cleaner. You are now ready to put the machine back together.
5. While you’re at it, clean out your keyboard. Whether it’s a lone keyboard or your entire laptop, flip it over and lightly shake it to encourage dust and crumbs to dislodge from between the keys. Use the compressed air canister to take care of any stubborn leftovers. If you want to really get in there, gather some cotton swabs and rubbing alcohol and wipe the outsides of each key with a moistened (not wet) swab. Run a moistened cotton swab along the touchpad as well, if you have one. This kind of cleaning can be done on a monthly basis.
Defragmenting
What is defragmenting and why should you care? We’re glad you asked. This is why defragmenting is a good idea: saving and deleting files causes your data to be strewn across your drive in bits rather than whole pieces. So, when your hard drive wants to find something, it may have to search in multiple locations instead of one, thereby slowing your whole system down. Defragmenting takes care of the mess by organizing your data so your hard drive can spend less time searching for it.
Now that you’re sold on the genius of defragmenting, you’ll be extra happy to learn how easy it is: if you’re running Windows Vista or later (or Mac OS X), your computer is already defragmenting itself automatically. On Windows, you can access your Control Panel, click on System and Security, and head to Administrative Tools where you’ll find the option to defrag your hard drive yourself. You’ll also be able to check when defragmenting is already taking place (and change the schedule if you wish).
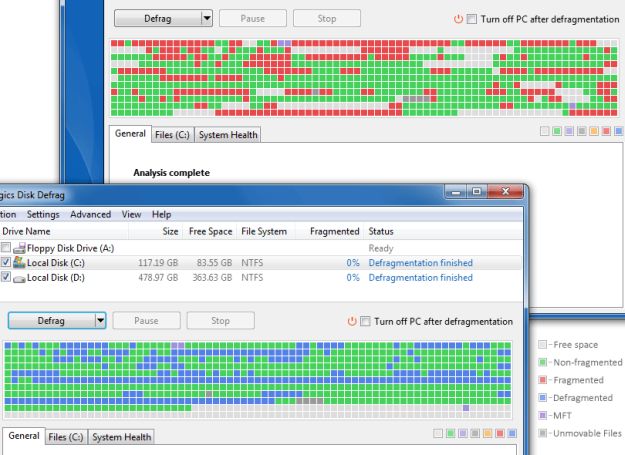
If you’re using Windows XP, though, your machine is not defragging itself automatically. In this case, make sure you can leave your computer on overnight to allow for the astoundingly time-consuming process. Auslogics Disk Defrag is a free piece of software you can use to streamline your defragmenting and can save you several hours. Plus, it lets you schedule automatic defragging. To save time, if you are not using Auslogics Disk Defrag, first run CCleaner (see below) to get rid of useless junk that doesn’t need defragmenting and will only drag out the process.

Note: if you have a solid-state drive (SSD), you may want to defragment everything except this drive. Defragmentation is negligible for SSDs and often destructive: it can cause excessive wear as it makes added writes. If you are using Auslogics Disk Defrag, you’ll be able to set it to not show your SSD drive in the list of defragmentable drives.
Free software solutions
Try out the following programs to destroy viruses and malware, remove unnecessary files and histories, shorten how long it takes for your system to start, and otherwise unburden your system of time- and energy-sucking paraphernalia lurking in your machine’s insides.
AVG
Checking for a virus infection is crucial since viruses are often to blame when your system loses its mojo. You don’t need to shell out any money to get a quality program. Try the award-winning AVG Antivirus. It offers a fast, comprehensive virus scan with free updates. It also detects threats and malware – and stops them in their gritty tracks. Once you download it, the program provides step-by-step instructions to scan and clean your system, as well as free phone support in case you get lost.
CCleaner
CCleaner is a favorite cleanup tools because it is quick, easy, efficient, and free. It will help you clean up your files by checking all of your browsers and clearing up temporary Internet files, cookies, caches, and passwords and download histories, as well as temporary Windows and log files, and recent documents. It’ll even take care of applications and clean out your registry. Configure it to run automatically on a schedule and you won’t even have to think about it.

Autoruns
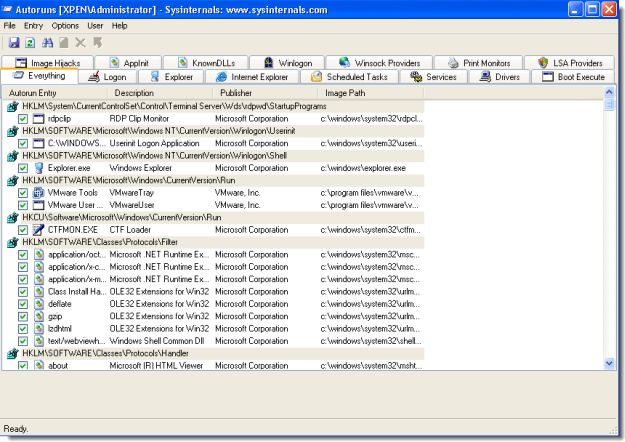
Do you have to wait awhile once you start your computer before you can actually use it? If so, you probably have too many programs configured to run when Windows starts. Enter Autoruns. Download this user-friendly tool and you’ll discover which programs – whether in your startup folder, Run, or other Registry keys – are slowing your system down to a crawl at startup. You can configure it to show you other locations and any third-party auto-starting images that may’ve been added to your system against your will. Simply uncheck the box next to the auto-start entry you want to disable.
Revo Uninstaller
Whether you’ve fallen prey to crafty marketing schemes that led you to download embarrassing amounts of software you don’t use, or whether your new computer came loaded with it, Revo Uninstaller will do a better job than Windows alone to destroy unwanted programs. This freeware not only uninstalls but also removes leftover traces of software. Not sure what a program does? Change the view from List to Details to see more information. One of its other neat features is the Hunter, which allows for convenient click-and-drag uninstall and process killing. Should you need it, free professional tech support is included. A paid pro version with multiple extra features is also available.
Soluto
Soluto is an “Anti-Frustration Software” that examines your system and uses an online knowledge base to compare its findings and suggest solutions to improve your computer’s overall performance. Its Chop Boot focuses on curbing how long your system takes to start by determining which applications are slowing it down. Lighten Web Browser optimizes your Web browser to increase speed, and Heal Crashes attempts to cure any issues leading to program crashes.
Auslogics Registry Cleaner
Registry cleaners are practical because, as you install and uninstall software over time, your registry gets muddled with outdated and corrupted entries that can provoke system errors and crashes. The solution? Use the easy-to-use Auslogics Registry Cleaner to clean out junk and fix errors. This program selects a default list of drives and items on your computer and swiftly scans and repairs issues before they become more troublesome. In case it deletes something you later decide you’d rather keep, you can go to the Rescue Center under File and restore your files from backup.
Wipe it fresh and start from scratch
With proper upkeep, you may end up replacing your computer altogether before you get to this point, but if you’ve had your computer for years and nothing seems to work, the best solution may be to start anew. If this is your chosen path, here’s what you’ll need to do.
Start by backing up all your data. You may opt for an external hard drive, a solid-state drive (SSD), or a cloud service to do this most comfortably. Be especially careful to back up e-mails if you use a non-Web-based program like Outlook or Thunderbird.
You may also wish to keep the bookmarks or favorites on your browsers, as well as your passwords and even cookies. For Firefox, use Mozilla’s Firefox Sync in the Tools menu to set up an account, or try MozBackup. If you’re a Google Chrome fan, you can use its sync function to save your settings to your Google account. Once you log onto it with Chrome on any computer, you’ll have all your settings with you (including bookmarks, extensions, apps, and themes). If you use more than one browser, try the free software Xmarks to sync the data from all your browsers (it works with Firefox, Chrome, Internet Explorer, and Safari). To back up your drivers, try DriverMax or SlimDrivers.
If you own a big brand computer, it may have come with a recovery CD that will make restoring your operating system super easy. If not, you’ll need to locate an install disc and a product key unique to your copy of Windows, which you may find on a label on the PC itself (you can also locate the key code from your computer before you reinstall the system using a free product key finder program).
Final step: upgrade
You’ve tried all our tricks and even reinstalled your operating system, but you’re still not satisfied? It seems like your computer’s hit its limits. It may be time to upgrade.
RAM
If you run heavy programs like Photoshop, or just tend to run a lot of programs at once and notice that your system slows down when you switch from one to the other, installing more random access memory (RAM) could make your life easier. To find out how much RAM you already have, visit your Control Panel and check under System (on a Mac, click on the Apple icon on the top left corner of the screen and then on About This Mac). Next, you must find out how much more RAM your computer can handle and what kind you can install in it. Crucial and Kingston Technology are good resources to figure out what kind of RAM will work for you at this point.
Solid-state drives (SSDs)
Switching from a regular hard disk to a solid-state drive (SSD) (sometimes called a solid-state disk) can make a huge difference in speed and in reliability because an SSD has memory instead of moving parts, making reading data off it much faster than reading it off a hard disk, which uses quickly rotating discs. When you have an SSD, it doesn’t matter whether your file fragments are located in adjacent spots or scattered loosely all over: they’re just as quick to read. SSDs can even purposefully store pieces of files in different places to even out wear. In addition to making it lighter and less energy-dependent, the lack of moving parts also makes SSDs shockproof and more durable, further extending the life of your machine.
If you’re going for an SSD, you’ll need to find out what kind is compatible with your computer. Again, Crucial and Kingston Technology are your go-to resources to find out. Once you’ve chosen your new SSD, you’ll be able to add them to your system yourself using an upgrade kit — with no experience necessary.
Video card
If you play 3D games on your computer and have noticed sluggishness, you’ll want to consider upgrading your video card as well. Inexpensive machines tend to come with integrated graphics built into the motherboard, instead of a separate graphics processing unit (GPU), which boasts much more impressive graphics capabilities. Even if you have a GPU, you might want a faster one, depending on the game titles you’d like to play. Just like with RAM and SSDs, you must first figure out which card will work with the computer you already have, as not all cards will jive with your motherboard. Do you have an accelerated graphics port (AGP)? Most likely PCI Express (PCIe)? Is it integrated into the motherboard or is it a separate card? Investigate before you buy, especially because some video card upgrades also necessitate an upgrade in your power supply. Check out this guide on how to buy a video card on to get started.
Source : digitaltrends[dot]com


Post a Comment